fashion photo

More is More: Medium Format and 35mm Portraits on Black and white film: Part 1

There is a school of thought which advocates only shooting one camera and one lens in order to fully focus on your creative process which in the case of portraiture is about connecting with your subject. I have subscribed to this view for a long time - minimise your kit and maximise your attention on being present rather than spending time deciding which lens/camera to use next. Makes good sense and it absolutely works!

But during COVID as the restrictions meant that opportunities to shoot became fewer and farther between ( I also realised just how important to my mental health shooting is) my mindset shifted towards one of ‘this might be the only shoot I have for X months, why not bring some more stuff’.

I’m not here to tell you what you should or shouldn’t be doing because this is all down to personal preference - for me (for now) I’m adopting the ‘more is more’ approach. Like any new practice I went overboard at first and brought too much stuff which did kind of get in my way but now I feel I’ve found a balance that works for me.

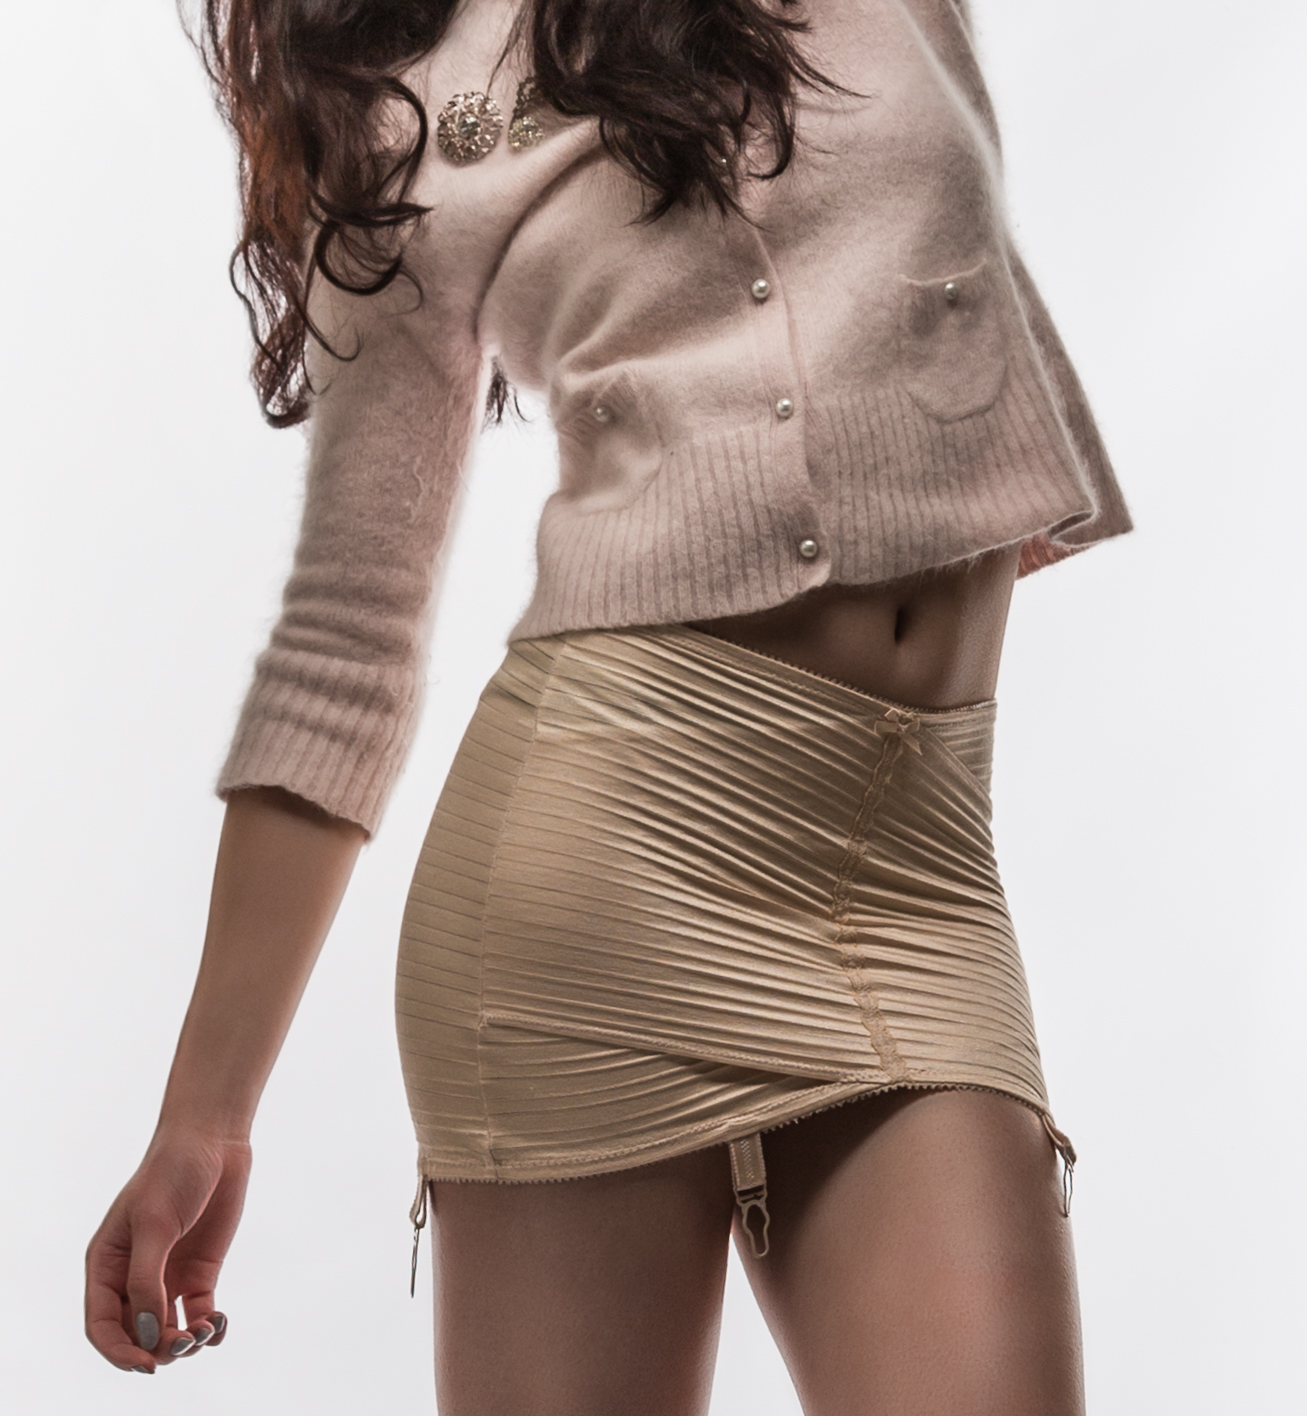
So let’s get down to business shall we? I’ve decided to split this into a two part series of blog posts about the same shoot (this is all about maximising right)? The shoot in question took place recently with a wonderful model Fae Rose someone I haven’t shot with before but absolutely will be working with again! Thank you Fae!

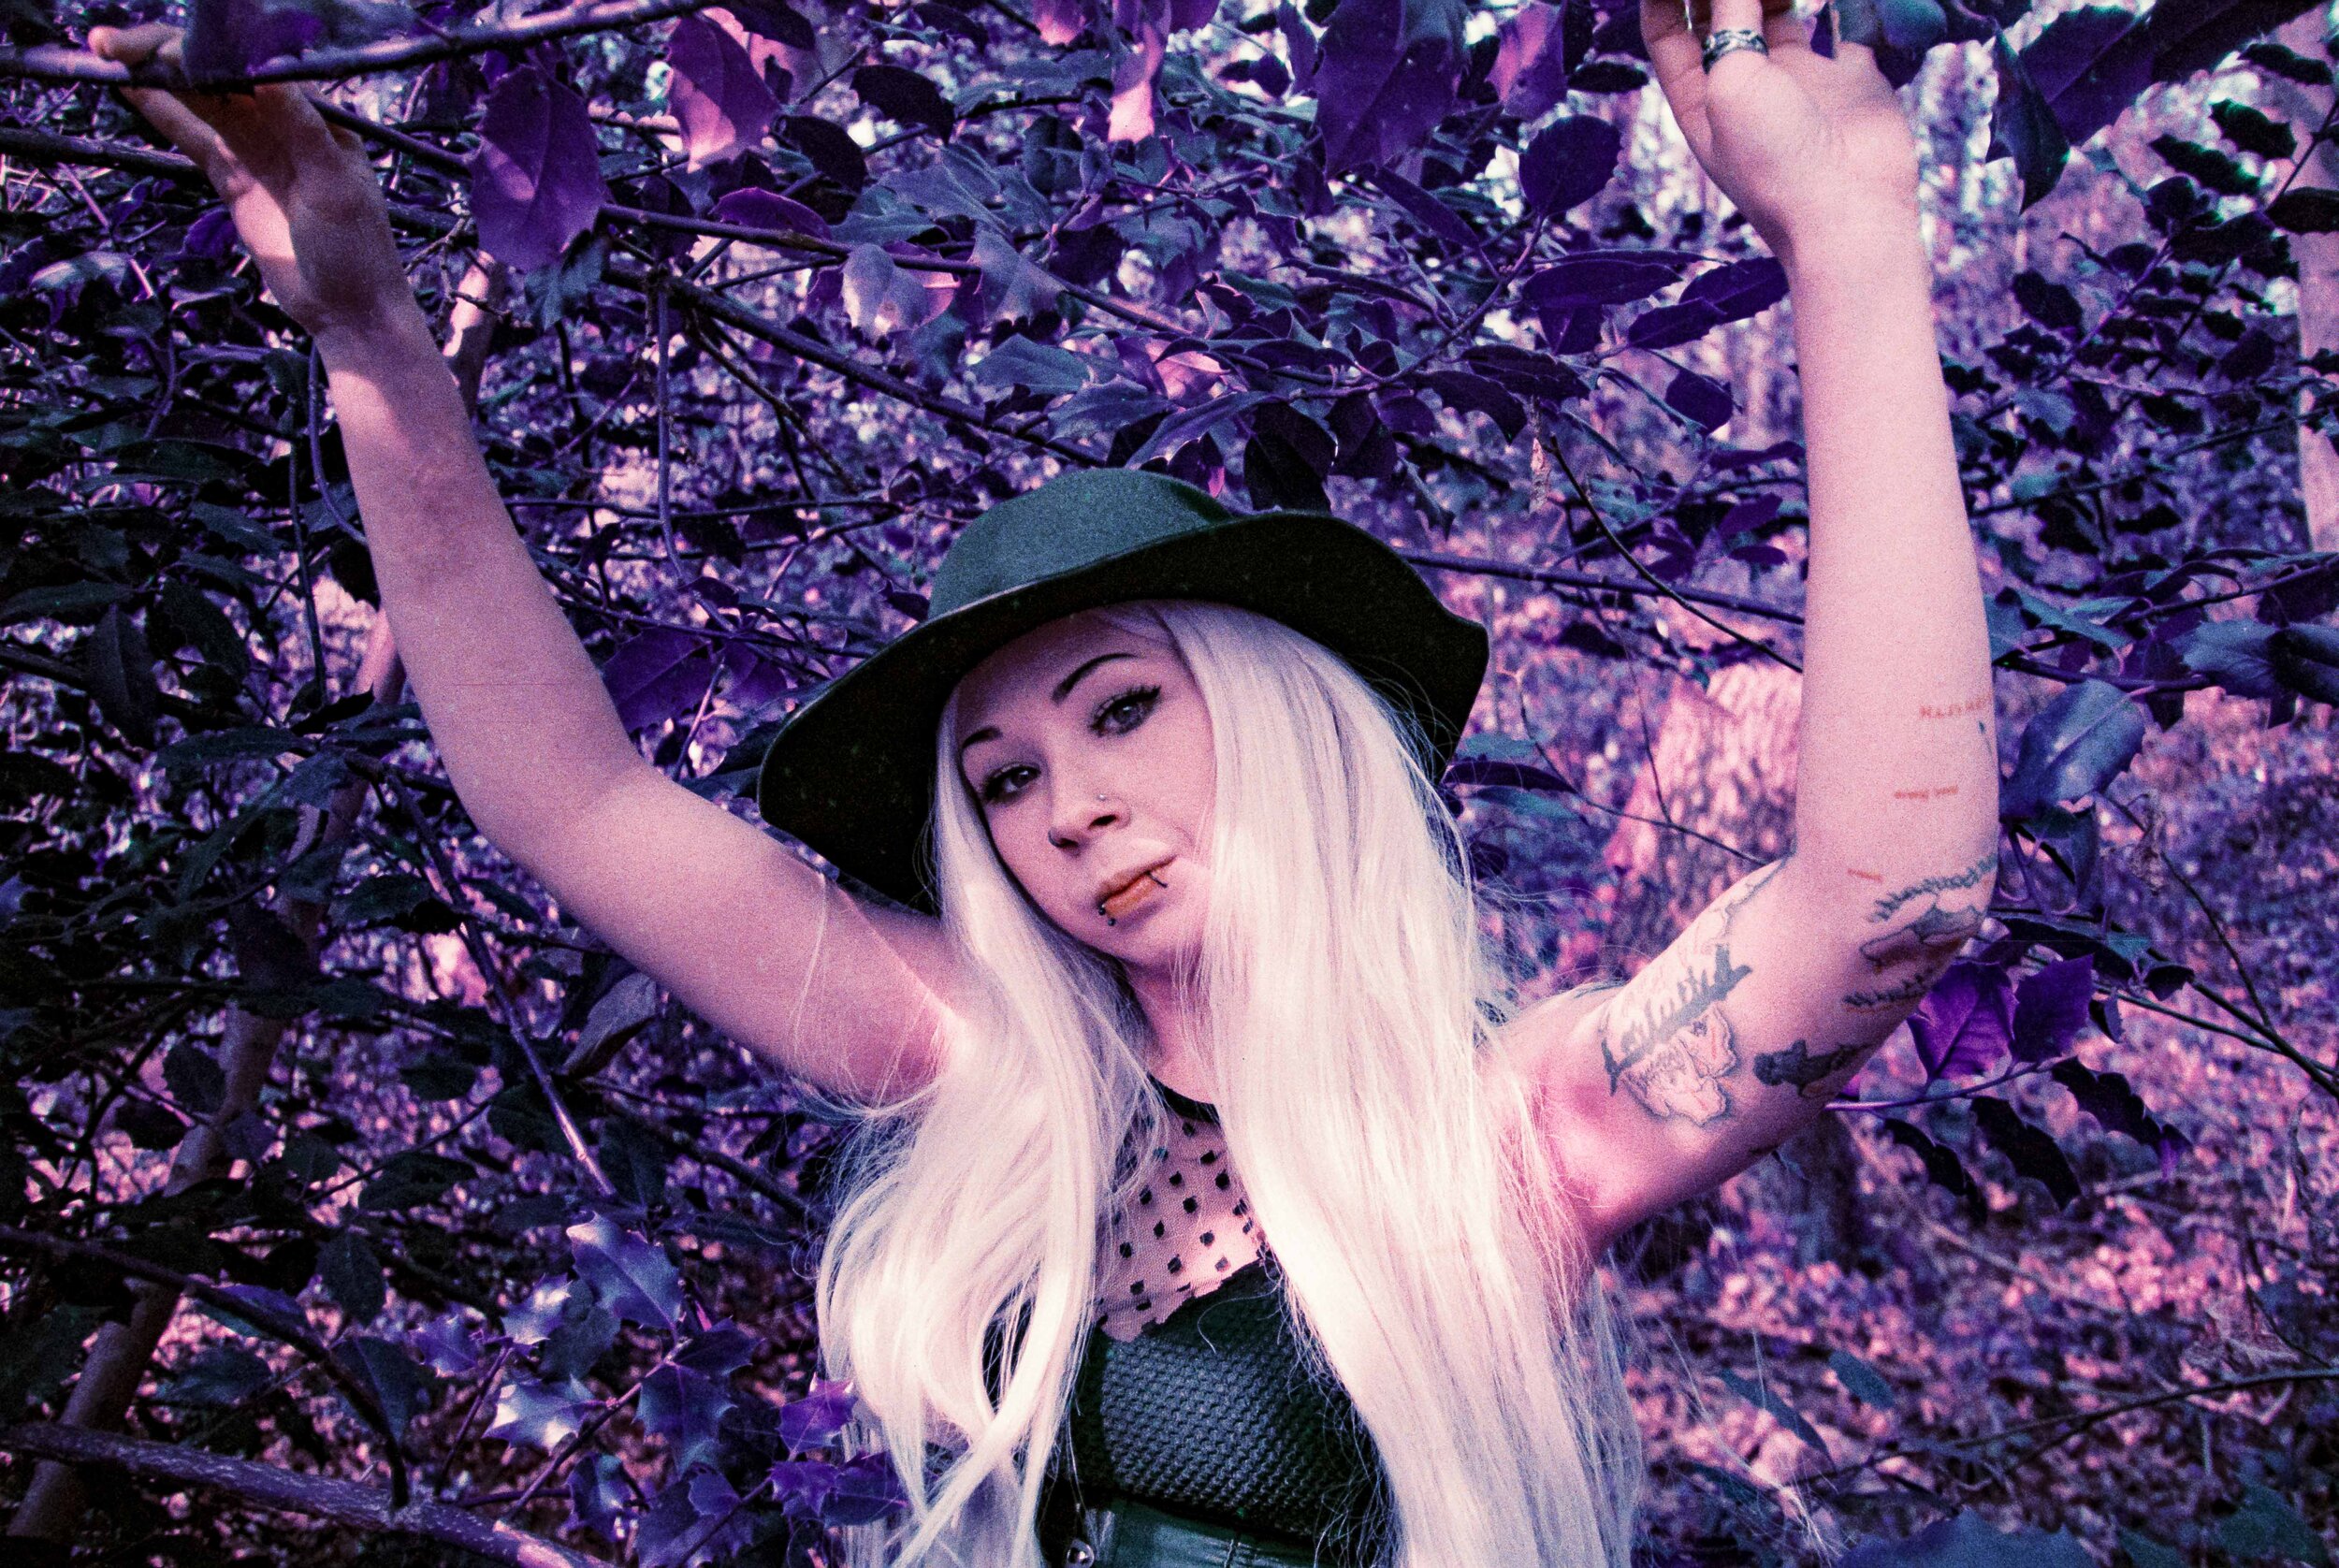
First up we’ve got some images from the ARAX CM using the stunning Carl Zeiss Jen Sonnar 180mm 2.8 lens.

Yikes this lens is so sharp!! Skin glows and backgrounds melt into a creamy dreamy blur. yum! I reckon this is the best portrait lens EVER made! It’s only downside is it’s size / weight - its a bit of a beast and it’s certainly not one for people who like to go unnoticed… people will think your toting a rocket launcher carrying this thing around! KABOOM!

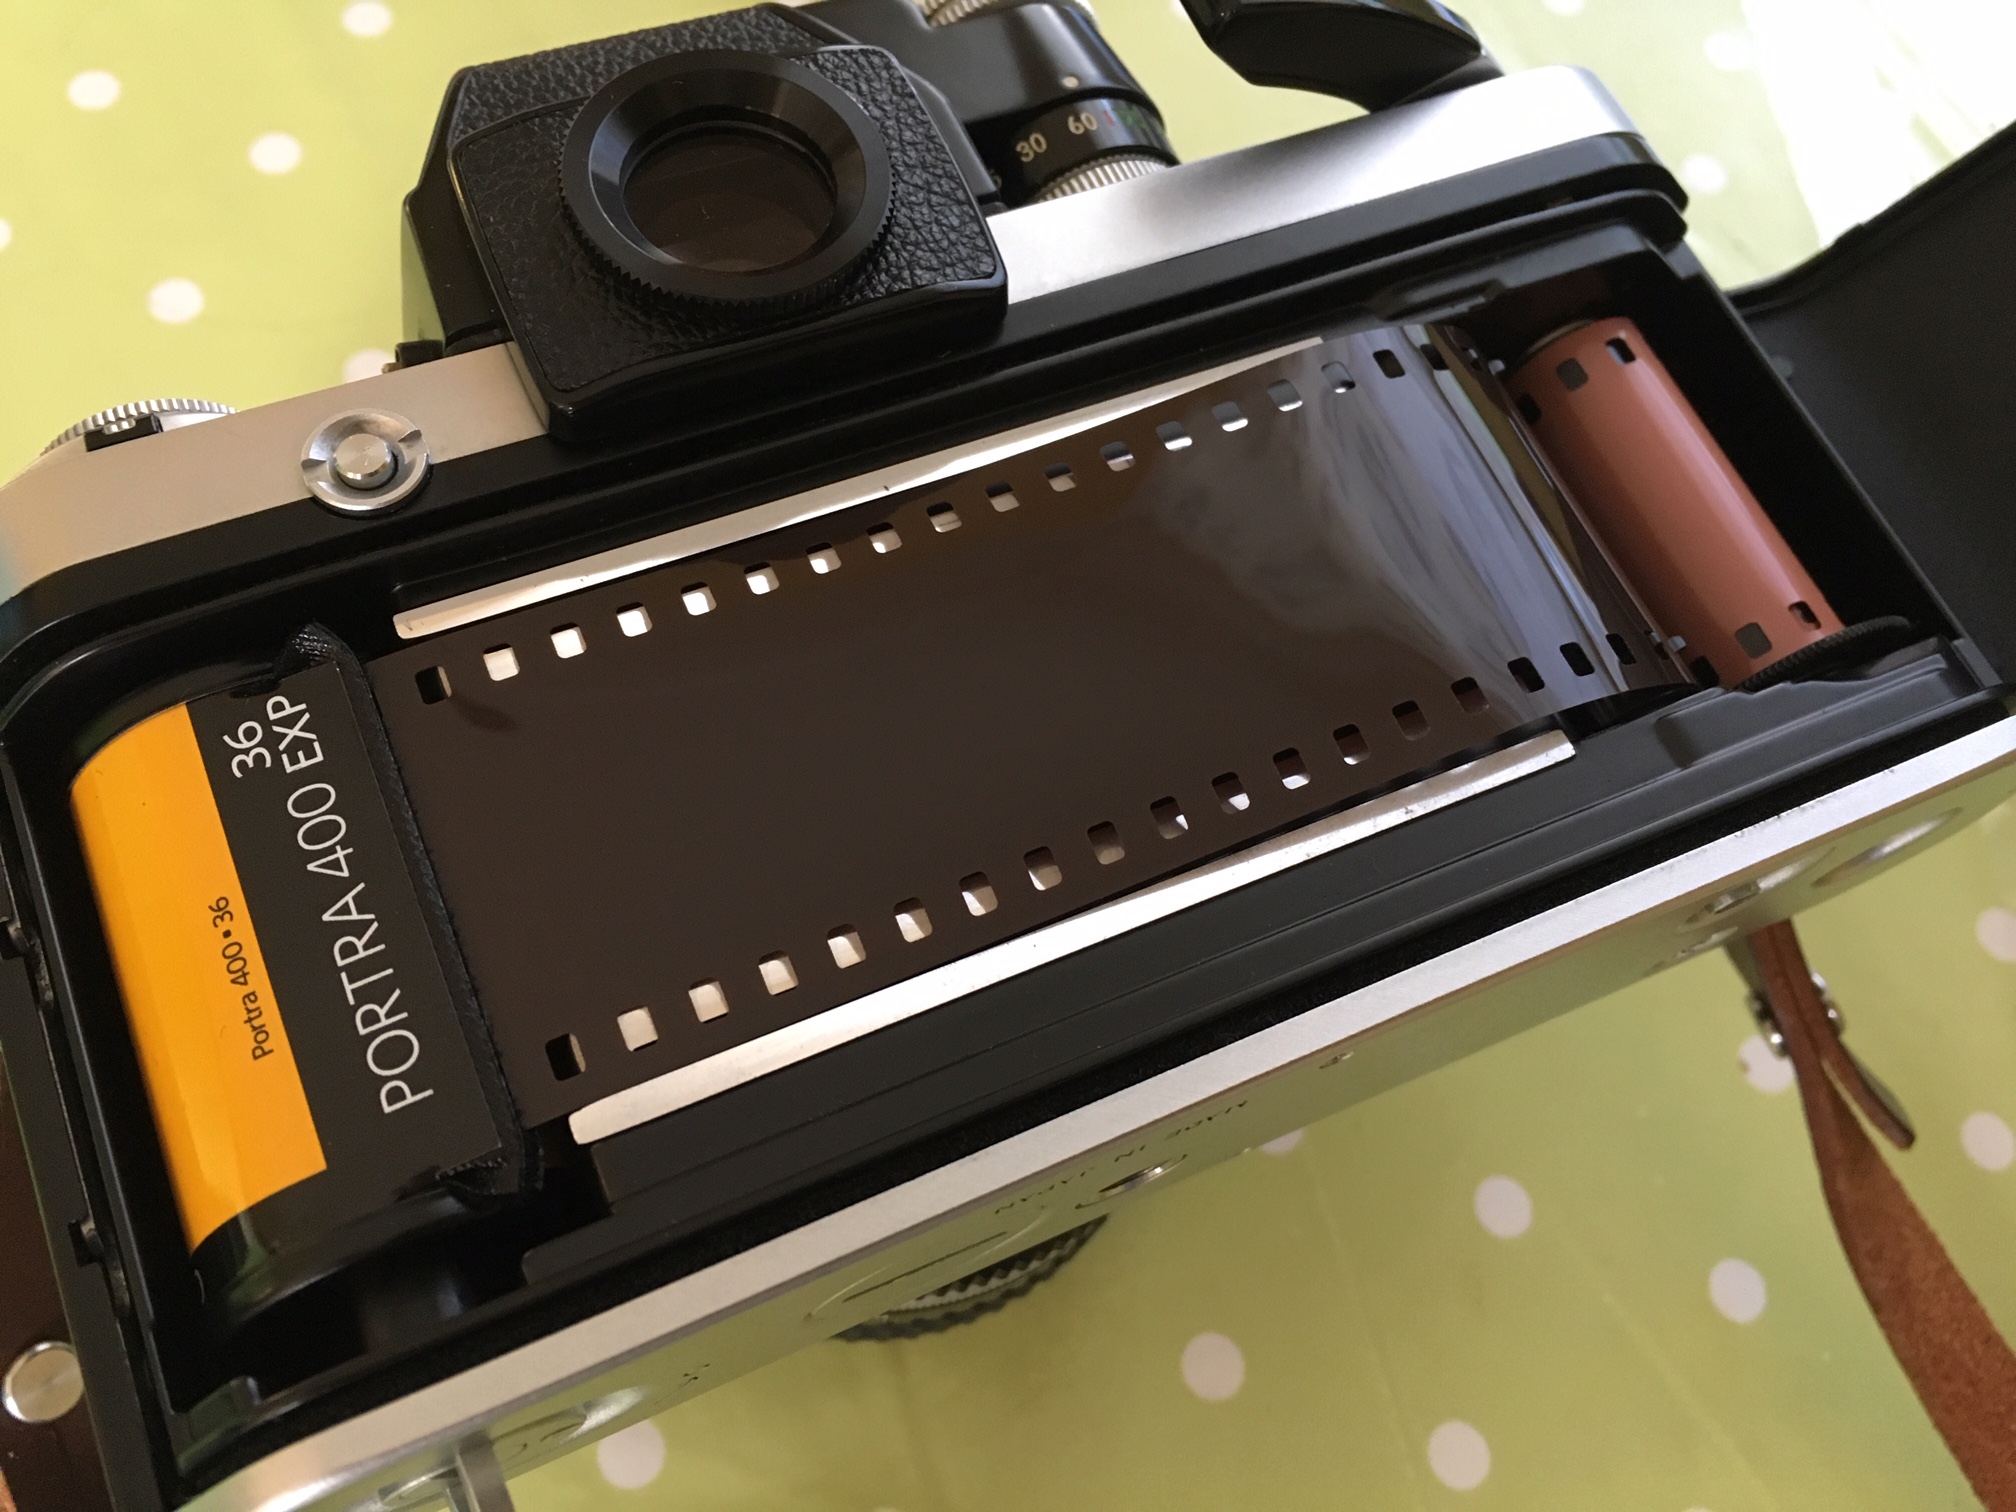
A few words about the film stock too - I have a few rolls of Fuji Acros 100 on ice which I picked up very cheaply, WOW! I am only really now appreciating this film, its beautiful stuff… I’ll be searching out more and also checking out the new version too!

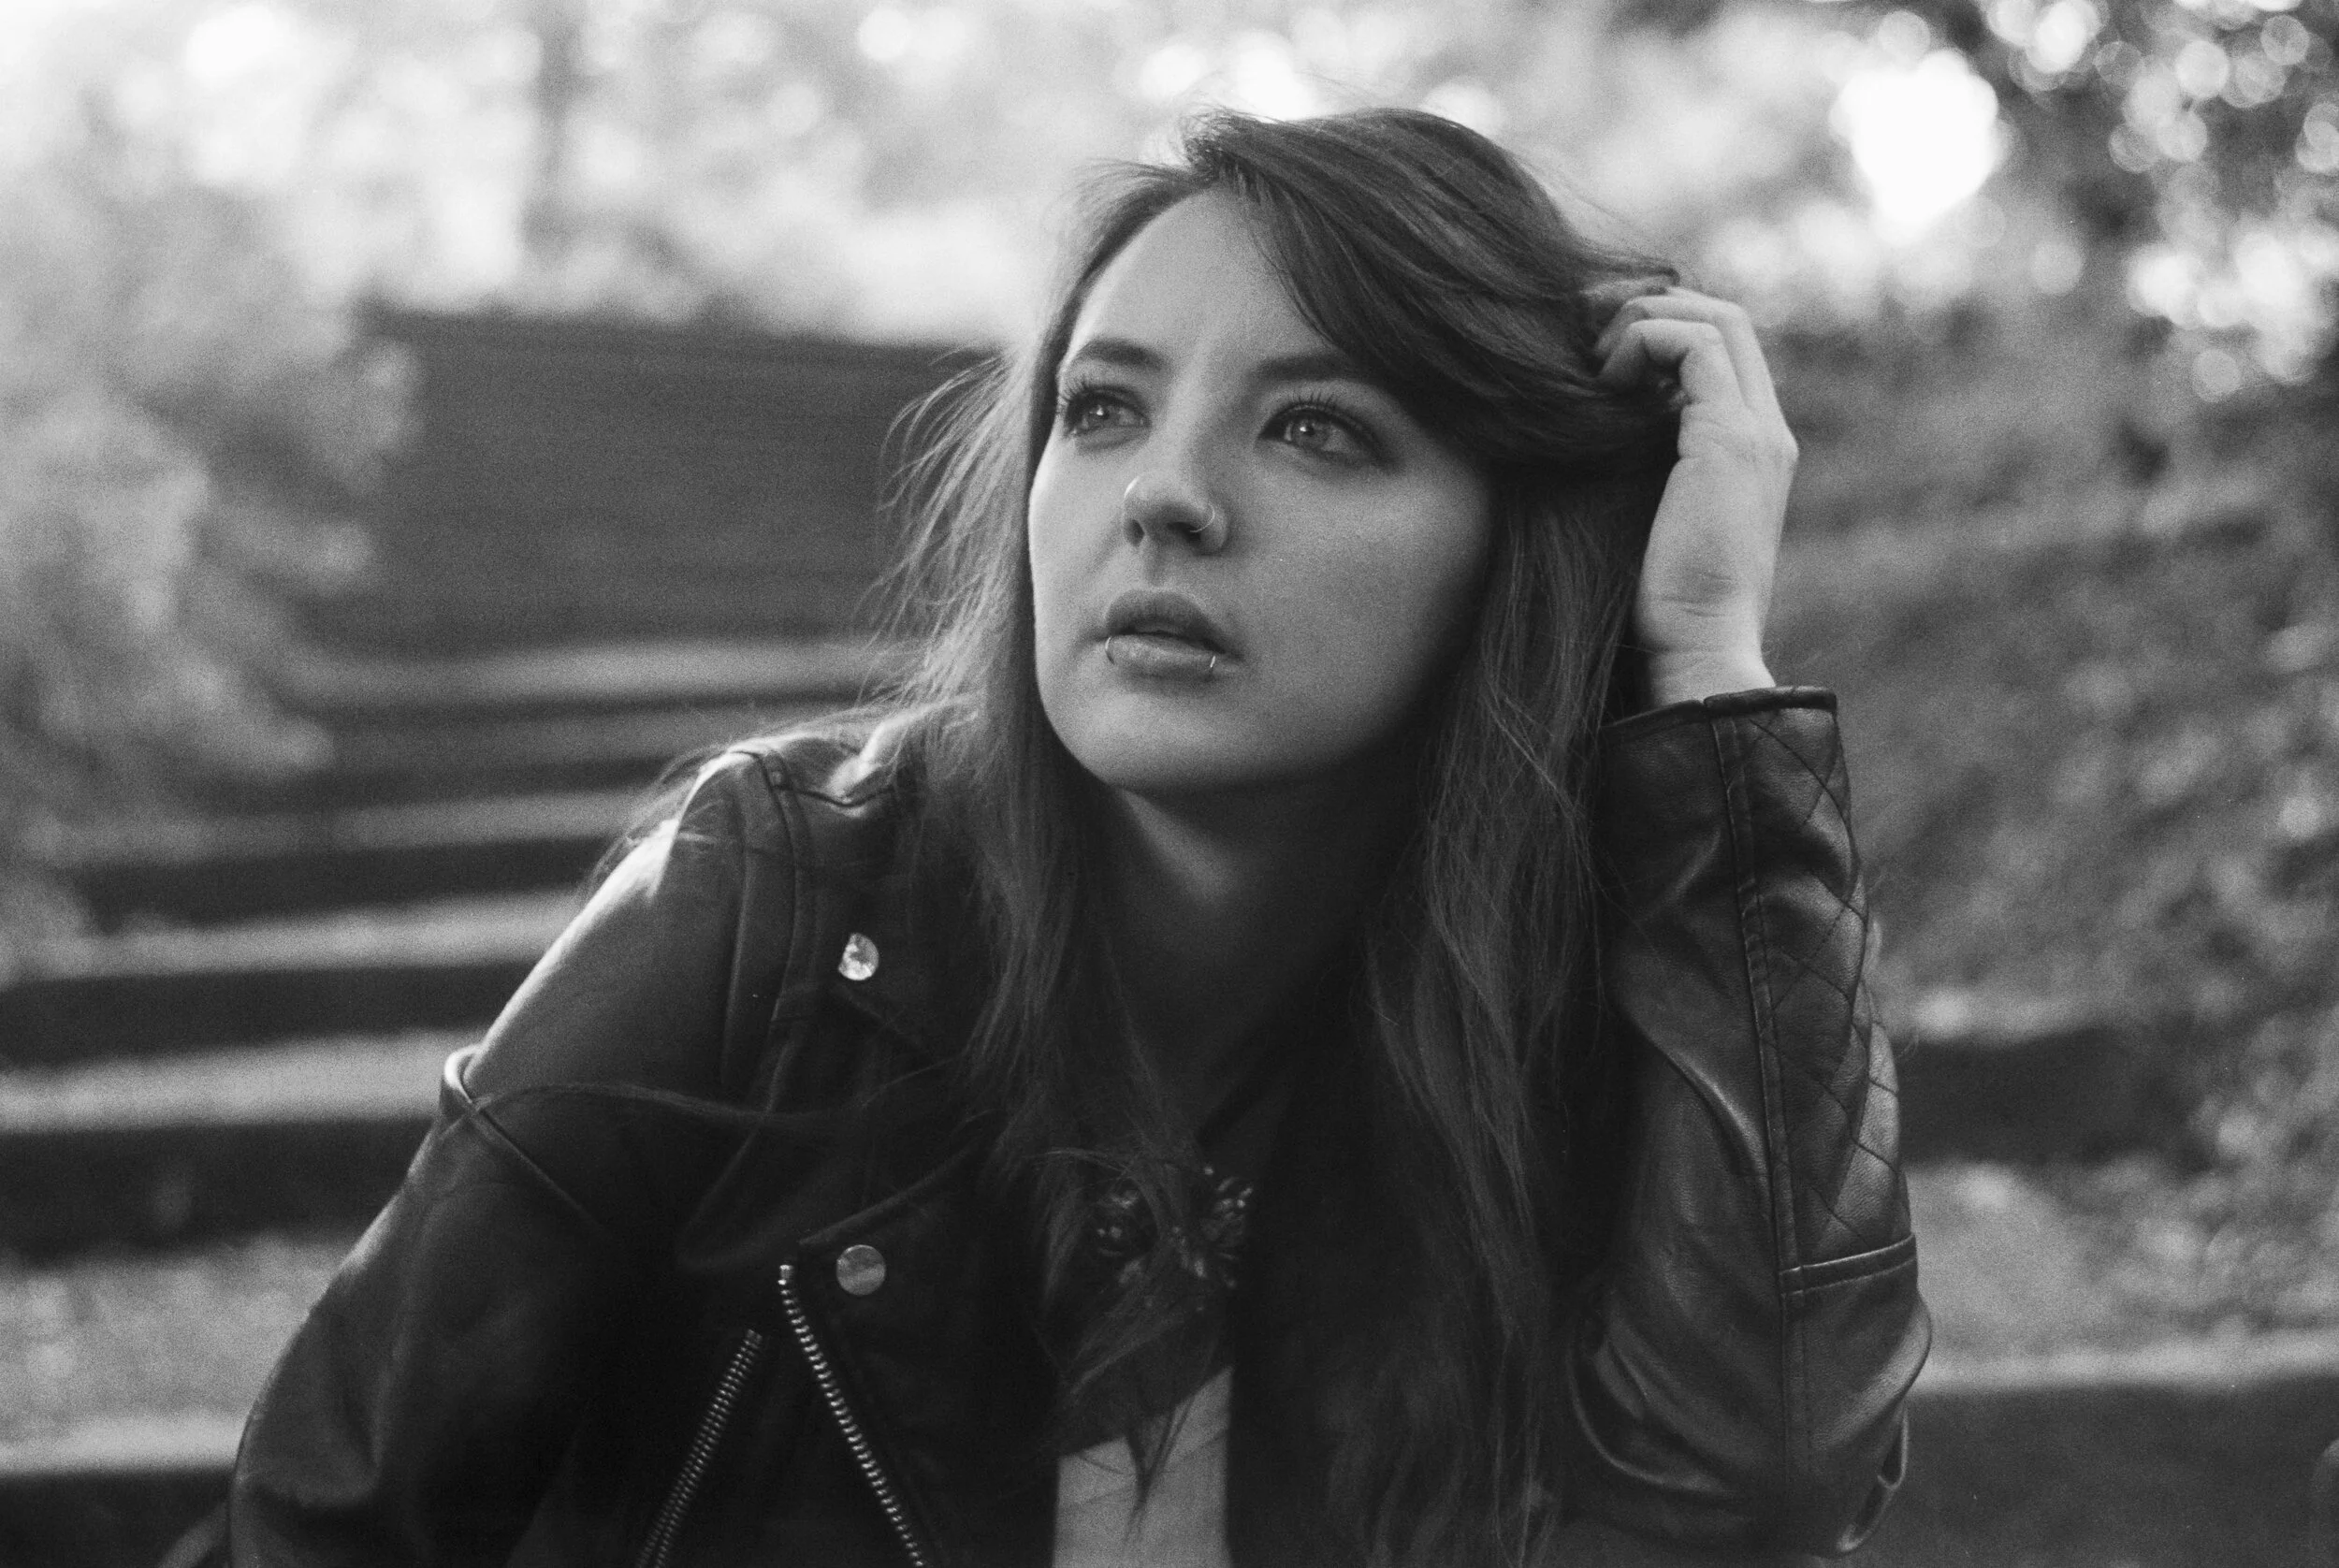
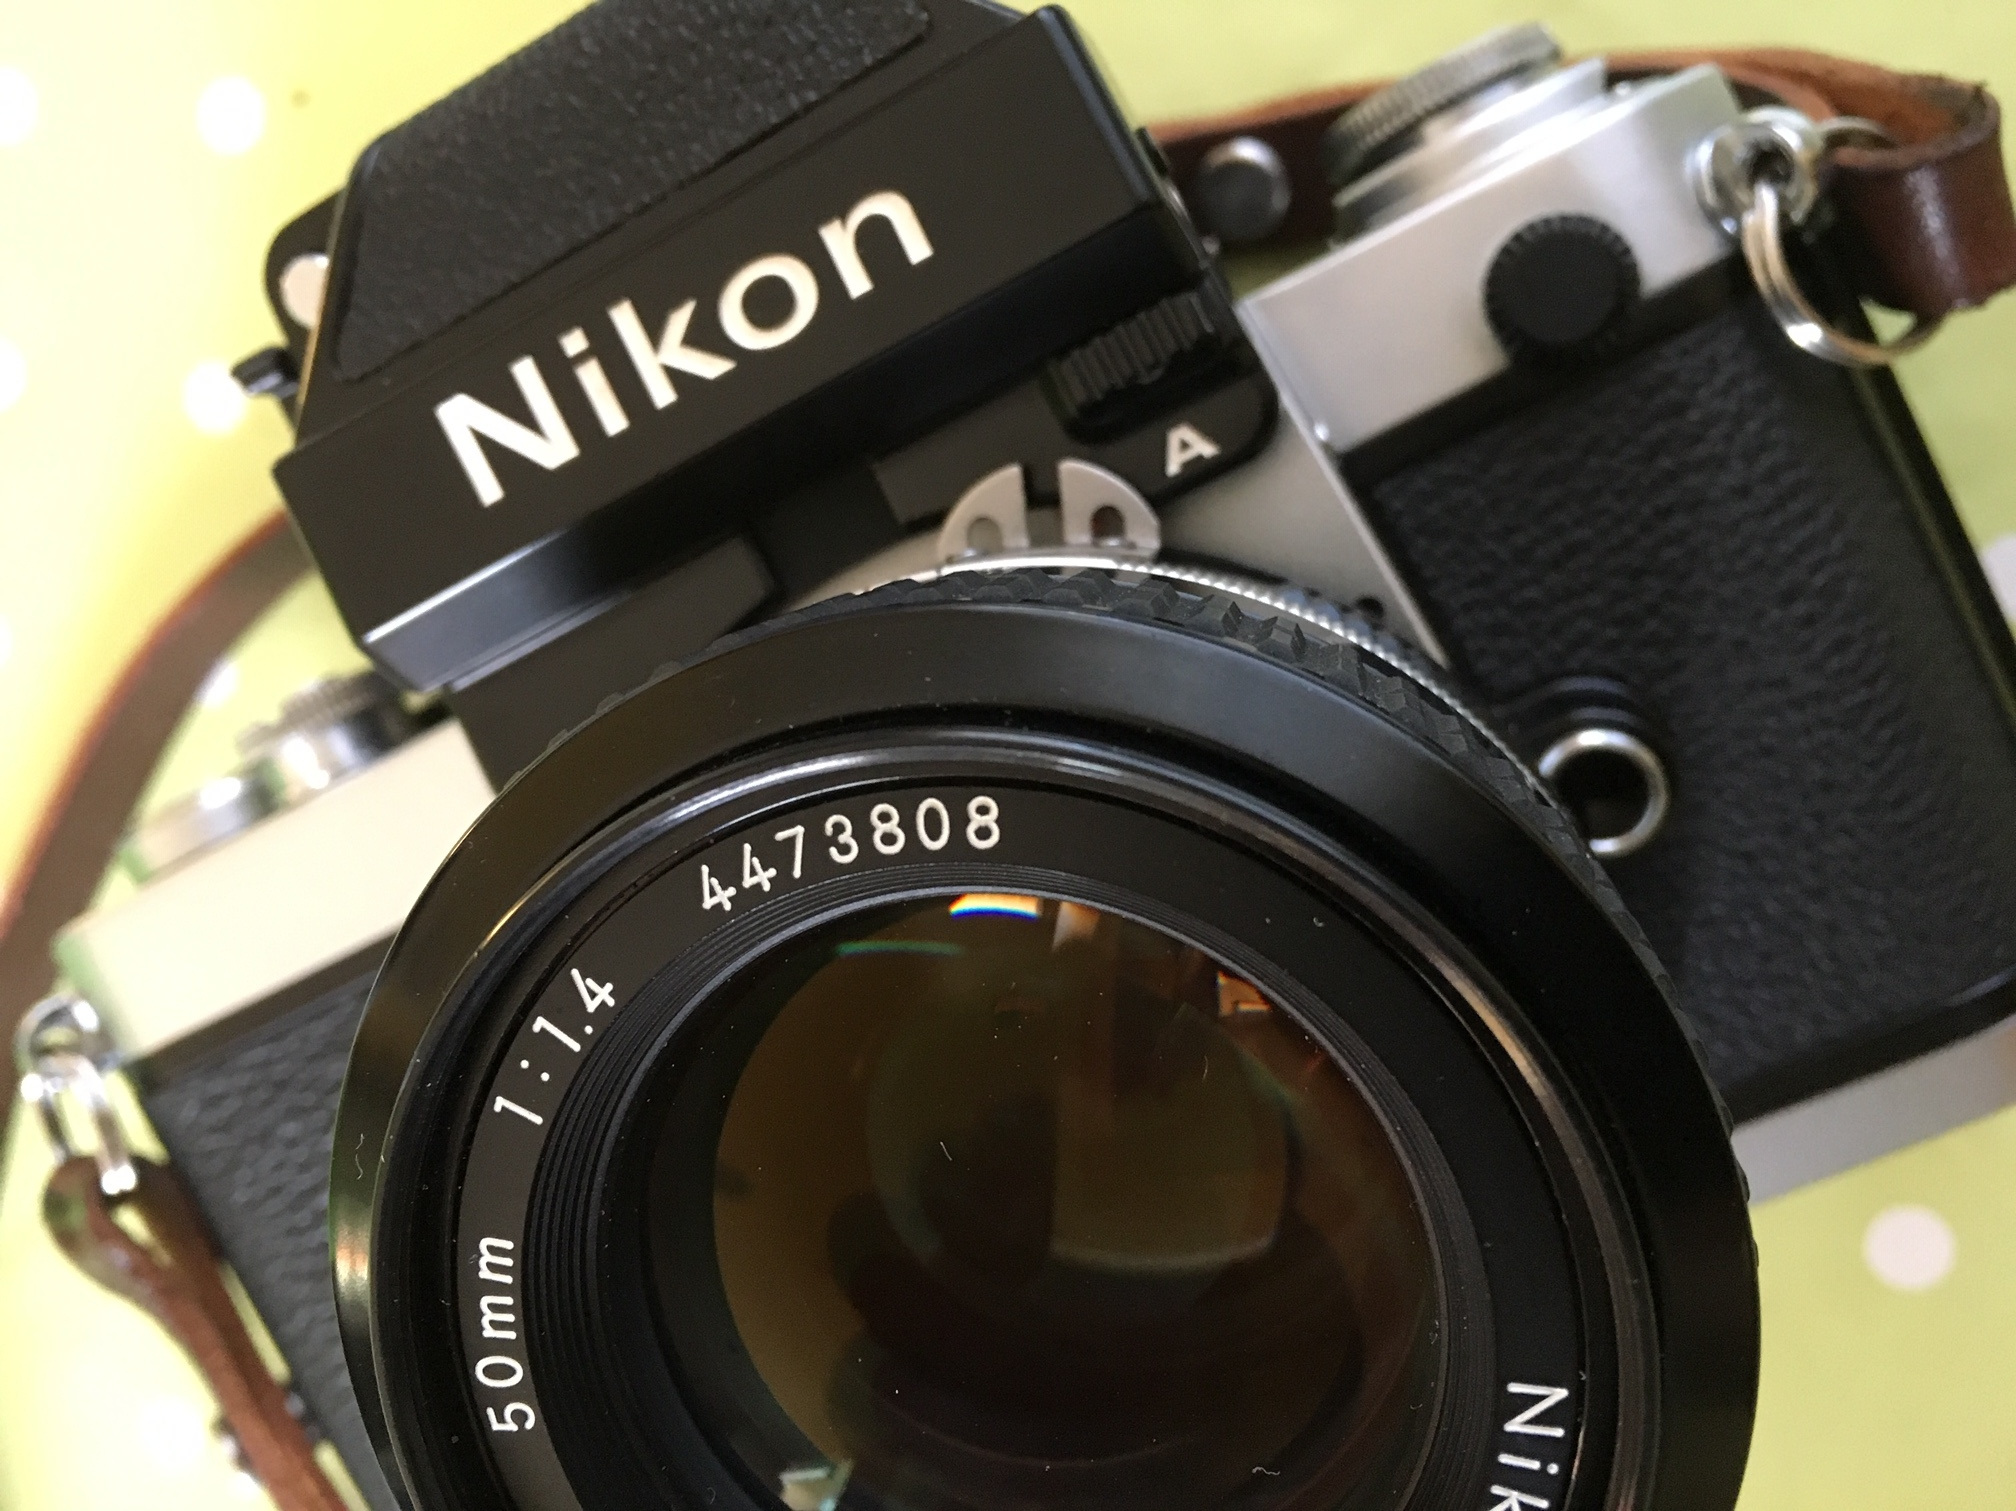
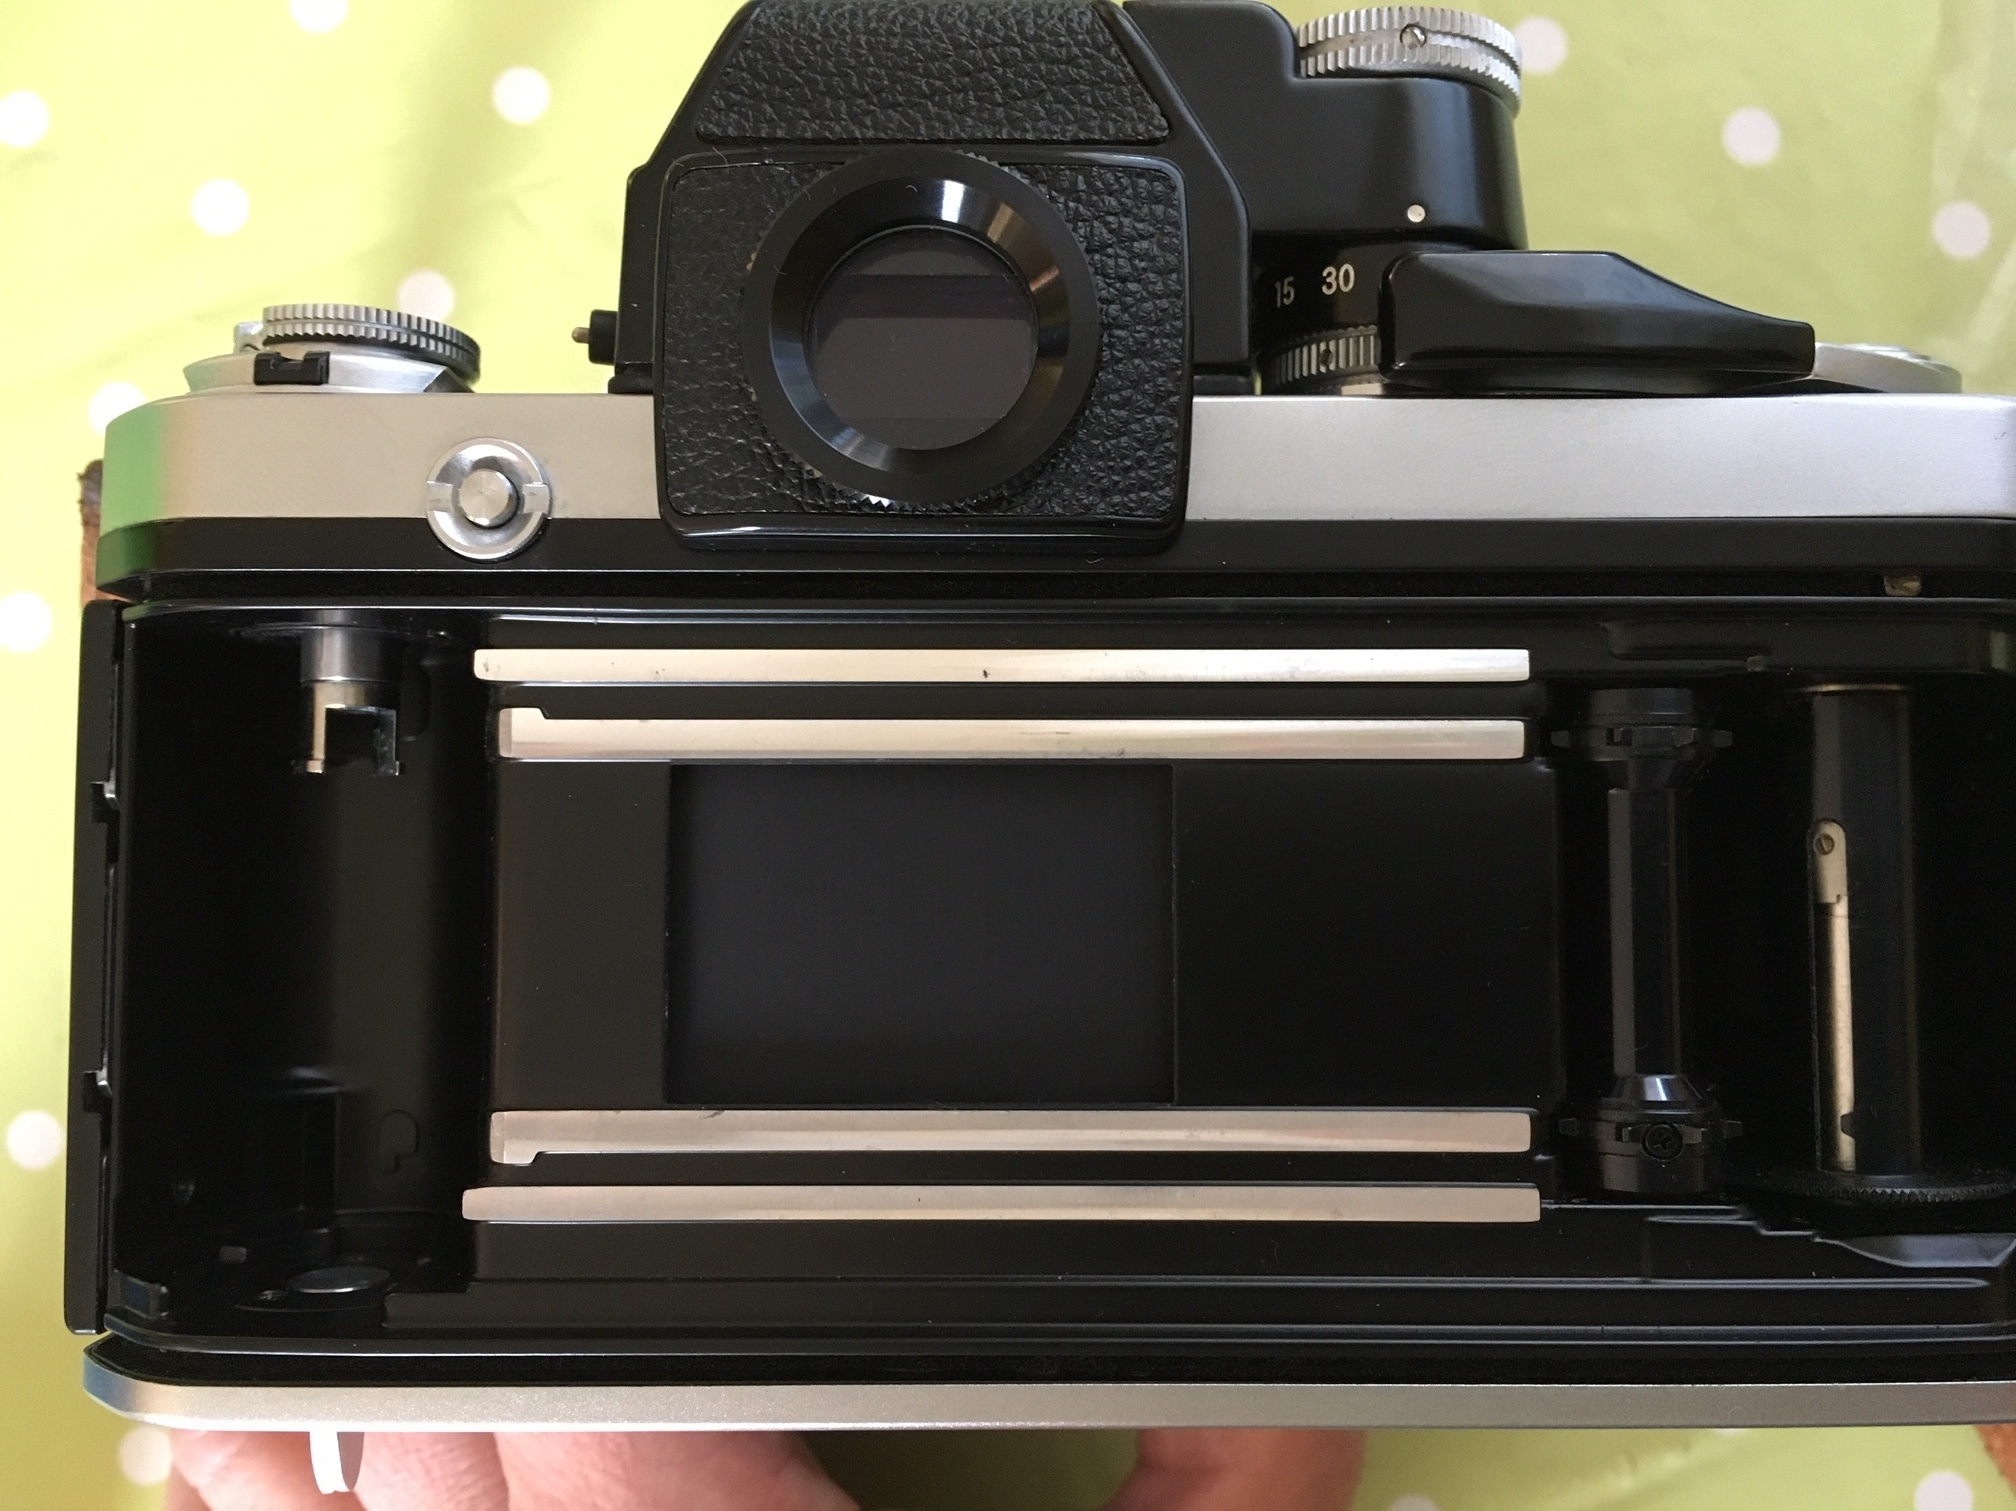
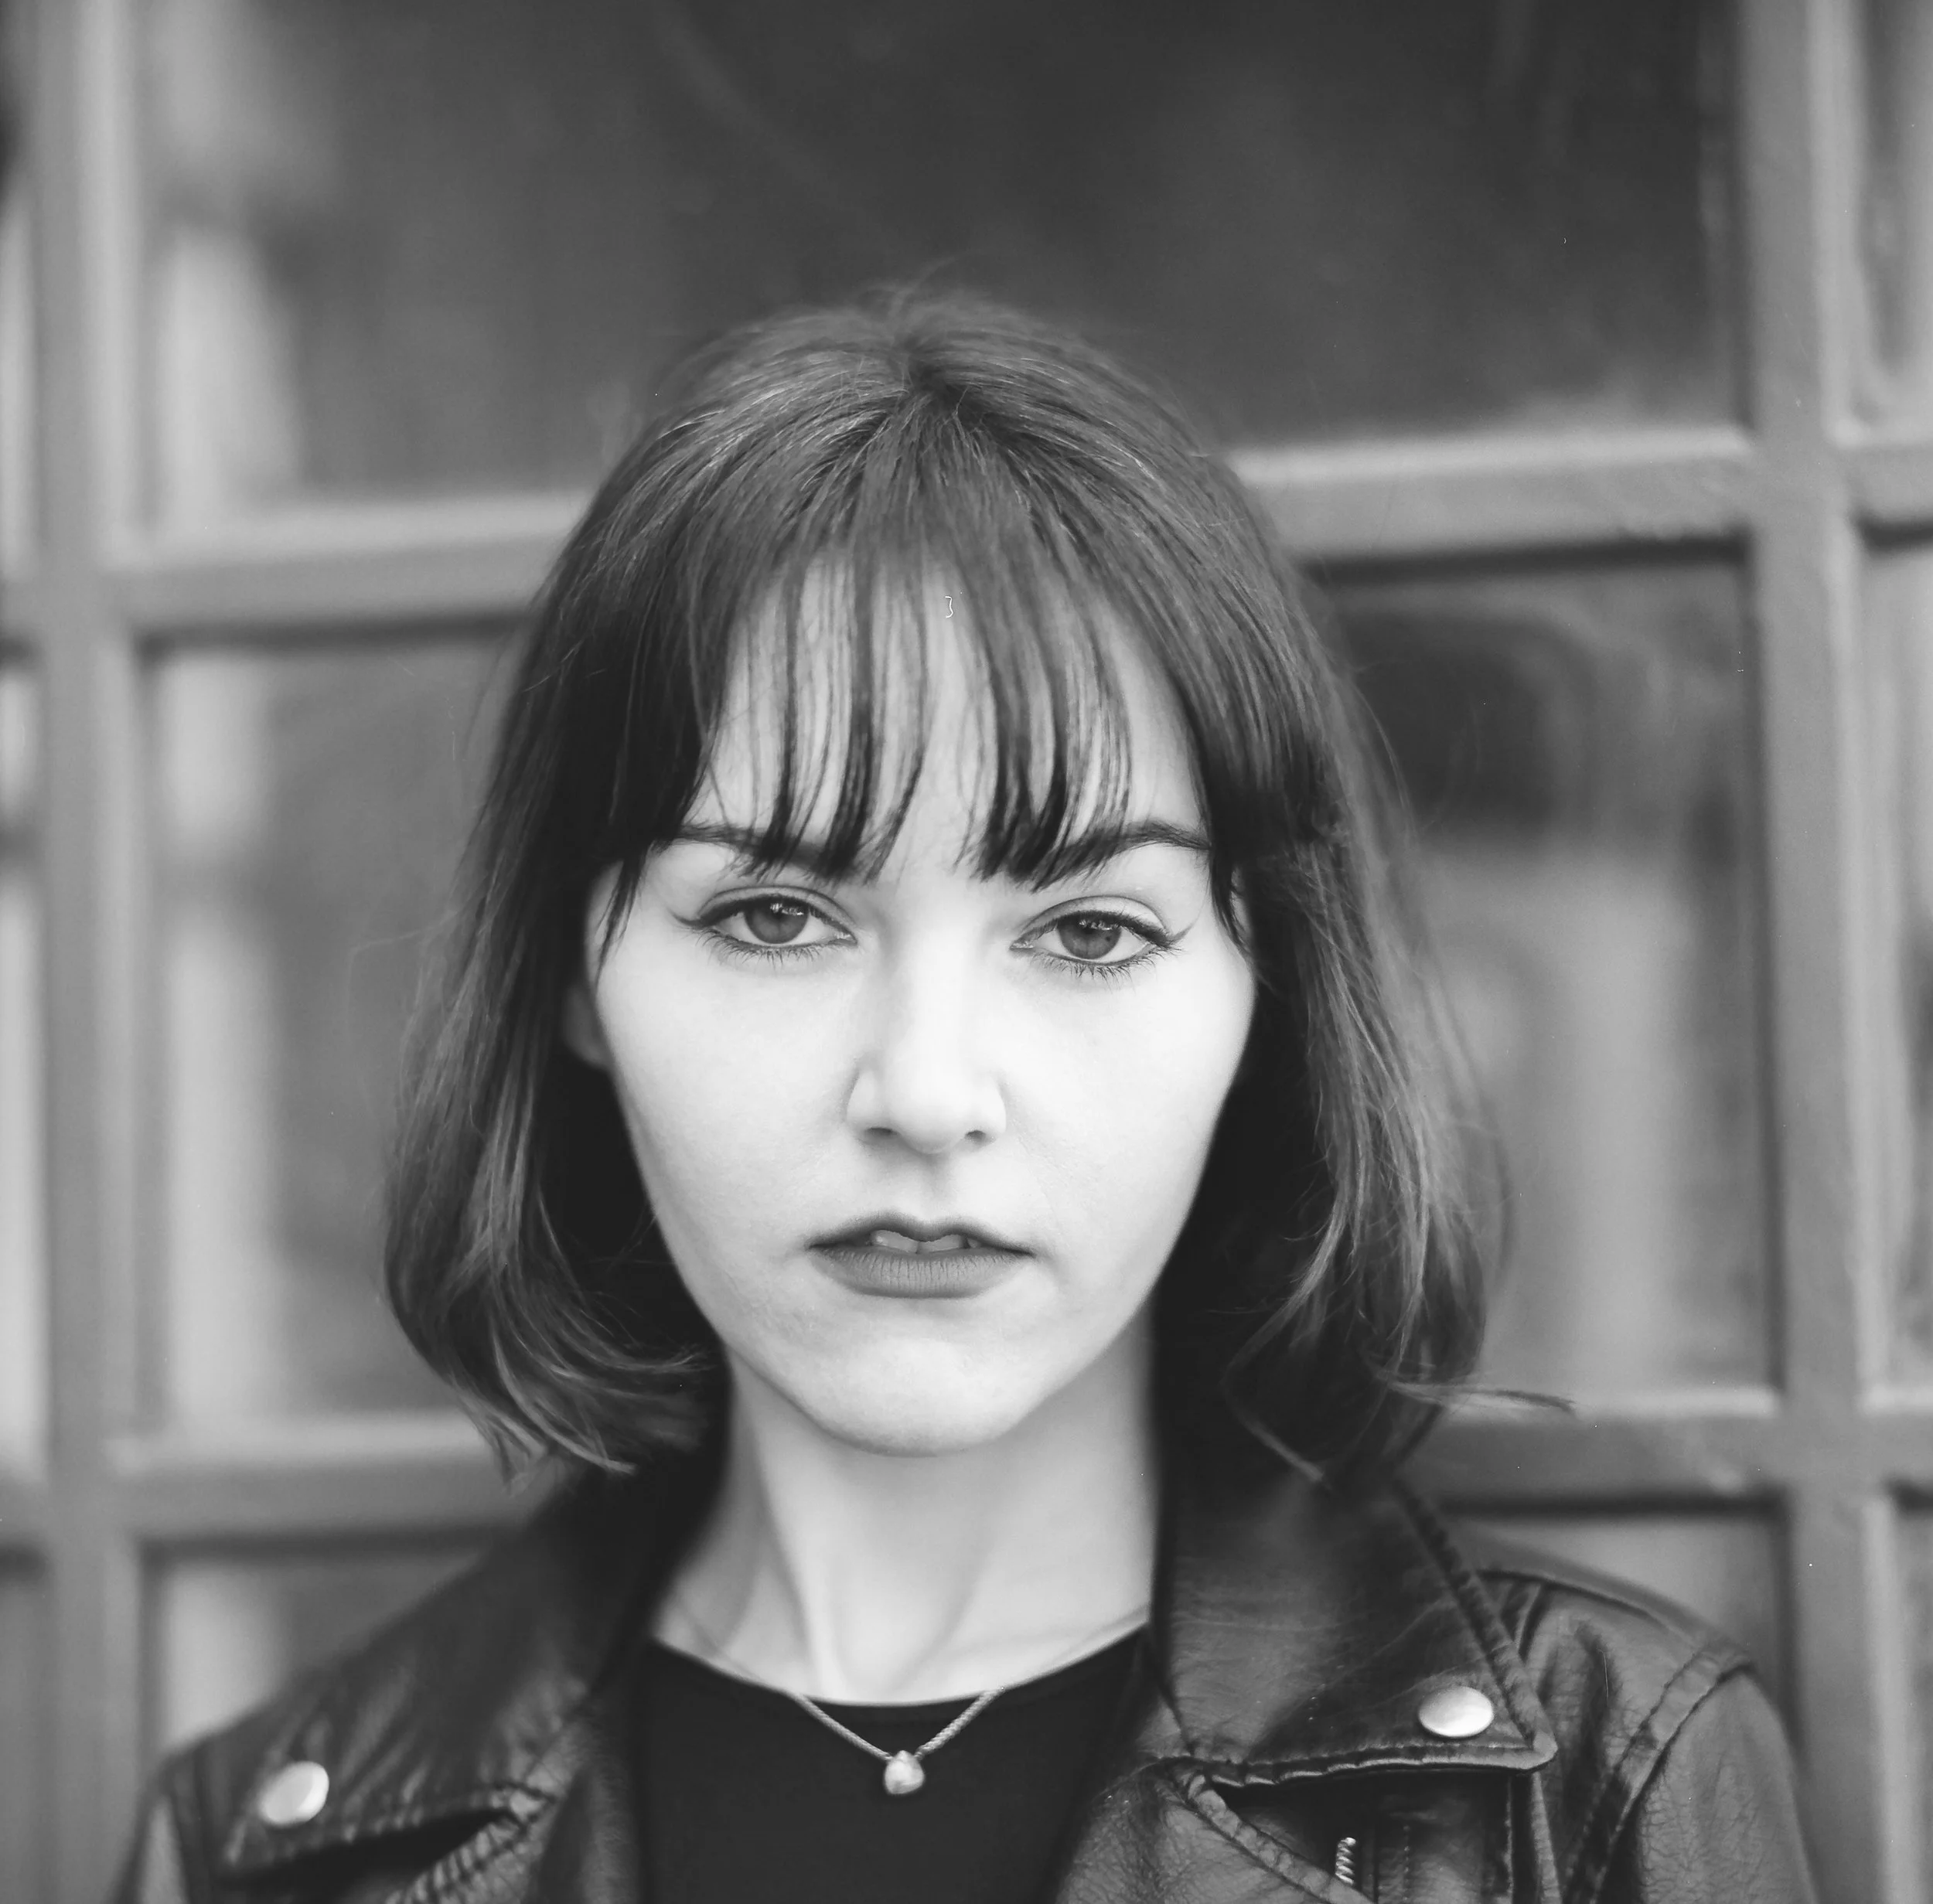
And now some 35mm shots from the Nikon F3 with the Nikkor 50mm 1.2 loaded with Rollei Retro 80S.

Yikes again!! Loving the results on 35mm film too - I only recently got the 50mm 1.2 and it is a stunner! I’ve shot Rollei Retro 80S before and again it does not disappoint - it has a very crisp, punchy contrasty look which is unique.

I am over the moon with how shots from both cameras came out - it’s given me two quite different look and feel with the different formats, social lengths and film stocks.

Ironically I decided not to swap lenses on either camera on this shoot (but I was glad to have the option to do so)

So what the heck was all that about then? Well, on one level I think it’s purely about 'what the hell is the point in owning all this stuff if you’re not shooting with it’ and on another level it’s about the final vision - offering different creative possibilities.

I am not advocating just taking LOADS of camera gear, throwing the kitchen sink at your concept and seeing what happens, I am however suggesting that if you put some thought into your shoots upfront you can select some kit that will help you realise your vision.

In part 2 of this series I’ll share two more sets of images from two different film stocks on this same shoot!

Lomography Lomochrome Purple Review

 
0-9.jpg

Hello friends!! It’s been a little while since I did an out and out film review but fear not!! Today I shall make amends for this by giving the first of THREE (that’s right THREE) film reviews - gosh aren’t you lucky (don’t answer that)! These were all brand new films to me that I hadn’t used before each with their own unique look, so while they may have been shot on the same shoot they definitely have their own story to tell. First up we’ll begin with some purple otherwordly strangeness in the form of Lomography Lomochrome Purple XR 100-400 (my goodness what a mouthful)!!

IMG_1197(1).JPG

I’ve had a couple of rolls on ice for some time and so with Lockdown restrictions easing here in the UK making photoshoots ‘a thing’ again I defrosted one roll and loaded it up into my Nikon L35AF point and shoot which accompanied me on a shoot with the very talented Monika - check her out on IG for more evidence of her awesomeness!!

As you can see Lomochrome Purple does exactly what it says on the tin - Blue becomes green, green becomes purple, yellow becomes pink! It’s an effect that is possibly as near to shooting old school aerochrome colour infrared that us mere mortals will get these days (proper colour IR film is STUPID expensive) what I love about the film is it can introduce an entirely new angle on a shoot - alongside the Lomochrome I shot some ‘normal colour’ film stocks but it was great to have this additional creative film along for the ride.

0-5.jpg

According to the box this film can be shot anywhere between 100 and 400, but looking around online I think it’s best to stick to the 100 side of things as this will give you the most pronounced purple colour shifts, of course your mileage may vary but this film isn’t cheap and I very definitely erred on the side of caution with my metering!

0-11.jpg

These were taken on a very bright sunlit day - in fact I had a reflector with me that I didn’t use and I wish that I had for one or two of these a: to balance the hard shadows and b: to give the film some extra light to work with - as you can see this film does not record shadow detail very well and the drop off is quite pronounced, that being said but I do kind of like the effect in the background elements as it gives you quite a punchy, contrasty look but I thinkI’d have liked to have kept some more detail around Monika as my subject!

0-13.jpg

The grain structure is visible and I quite like it. The film resolves quite a lot of detail especially in the highlights and where it does fall off the grain has a gritty feel - this is most definitely not a smooth film so be prepared to embrace the grain! What I did notice in the film scans and I confirmed this with Exposure Film Lab who developed the film for me was quite a few thin lines across the image possibly from dye running off through the development, it was easy to remove in lightroom but certainly expect to do a bit of post processing removing weird artefacts in Photoshop or Lightroom (I felt like a digital shooter for a minute)! UURGH!

0-35.jpg

I picked the above image out as it shows a few things worth taking note of:

1: This was probably the most extreme example of the lines that were apparent on more than a few frames

2: My sadness at the big bloody STUPID line spoiling the shot was lessened because clearly the little Nikon L35AF wasn’t feeling the strong backlighting here (even though it has a little lever to compensate for back lighting) clearly there are limits to what you can expect - and in this situation you can expect to see a big increase in grain and lack of contrast

3: Which moves onto point number three - The lomo purple clearly didn’t enjoy this lighting either - you can see the purple shifting to a more muddy, muted, brownish colour, and the grain structure kind of falls apart a bit too and loses contrast - meh!

0-8.jpg

I tried my best to make the most of the greenery around, at the time of the shoot most of the trees were still bare but there was enough evergreen ivy around for us to work with and Monika did a great job of diving into the spiky Ivy branches! Skin tones were very much on the pinky/red side of things despite Lomographys assertions that this film keeps skin tones looking natural but to be honest my advice is to just embrace the colour shifts and go with it, I really love how these shots came out - Lomochrom Purple is a great way to add an instant creative edge to a shoot and works well when shot alongside some more traditional colour/black and white stocks.

0-14.jpg

So in conclusion then what can we say about Lomography Lomochrome XR 100-400 (aside from the ridic long name) well my completely subjective and unscientific analysis is: I absolutely love it! (‘What a fucking surprise’ I hear you cry)!! Fair comment - I am yet to meet a film stock that I didn’t fall in love with one way or the other…. although with this one I was especially uncertain with it being such an unusual film to begin with and then first time shooting it.

One of the things that I enjoy about film photography is that many of your creative choices are made up front when it comes to choosing films stocks etc Lomo Purple gives you a really ‘out there’ trippy vibe right off the bat. It’s not a cheap film and based on my experience it really does need good lighting so while I have another roll on ice, I’ll be waiting for the right opporutnity to bring it out. I have to say that it was great shooting the little Nikon L35AF loaded up with this bonkers film - a great little camera that will have a blog of its own one day I promise!!

Would i use Lomo Purple as a stand alone film stock for a portrait shoot? No… I feel it’s more of a creative addition to your colour pallete rather than the main focus or at least that’s how I used it, which brings us nicely to a reminder to watch this space for parts 2 and 3 of this film review trilogy - I’ll be bringin you another Lomo film this time a more traditional stock Lomography colour 100 in medium format! I bet you can’t wait…. but you’ll have to, I haven’t written the damn thing yet…

From the USSR with Love: Portrait shoot with Soviet lenses on 35mm film

IMG_7510(1).JPG

I’d be lying if I said that I didn’t enjoy the process of preparing for a photo shoot almost as much as the shoot itself! The anticipation of all those endless creative possibilities to come, the excitement tinged with a nervousness that naturally accompanies these thoughts: Will everything work? Am I up to the task? Will it piss it down with rain like it has done all day today....

Film photography invites you to make creative decisions up front (not all of course as development, processing and printing are large factors too) but your choice of film, camera and lens are important considerations. Perhaps more so on film than digital as each film has different characteristics and vintage lenses have their own unique qualities that they bring to the table.

My main 35mm set up is an all Nikon affair but I also have a thing for Soviet lenses, there is just something about them that I am drawn to which allows for some interesting creative possibilities (or maybe it’s because they’re cheap)! While I love Soviet glass I’ve found that Soviet cameras on the other hand can leave a lot to be desired - in my experience they aren’t that reliable and since (annoyingly) M42 lenses won’t easily adapt to Nikon mount cameras I have added a couple of Pentax Spotmatic bodies to my collection which I use for my M42 shenanigans, I’m not going to go into a big review of the Spotmatic F because I’ve already done that HERE suffice it to say that it is a very very fine camera indeed and an absolute joy to shoot with.

So let’s talk lenses then, we’ll start with the Helios 44-2 which you can see at the top left of the image below - it is renowned for it’s ability to do swirly bokeh. But this is no one trick pony and it’s certainly not a novelty or toy lens. It is absolutely sharp (the caveat being that sharpness as a concept is MASSIVELY over stated) it has lovely contrast, tone and detail too and the bokeh is wonderfully smooth as well having some good swirly patterning. The best part? Mine cost me £10! I bought it attached to a broken Zenit camera for £25 - kept the lens and sold the zenit body for £15 :)

IMG_7475.JPG

There are loads of versions of the Helios 44, I’ve had several later versions all of which had really stiff focussing rings, I tried out this earlier 44-2 version and it’s my fav so far. The build quality is very good, focus is smooth and it has a preset aperture control so you choose which aperture you want using a ring on the front of edge of the lens, you can then adjust the aperture manually so you focus while it’s wide open and then stop it down to shoot (it takes longer to explain than it does to actually do it) this works well for me as I have a Spotmatic F which won’t mount non Pentax lenses with auto aperture pins (note to anyone reading this wanting to use a spotmatic for Soviet glass - if you have a Spotmatic F then stick with preset lenses or if you’re looking to buy just get an older Spotmatic).

The Lens attached to the Spotmatic in the image above is the lovely Jupiter 9, it’s an 85mm f2 lens - this focal length is one of my faves to shoot, especially portraiture. Slightly more rare than the Helios (but that’s only because they made literally a kabillion Helios lenese) the Jupiter 9 is a very very lovely bit of glass indeed - build quality is excellent, focussing is lovely and smooth. I bought mine via evilbay from a seller in Russia for £70. There were several versions of this lens, this is the single coated version dating from the mid 80’s i think - later multicoated ones seem to be at a premium far above any real world advantage you might expect. One of the most impressive things about the Jupiter 9 is it’s size- it’s almost the same size as the Helios!! It looks like a 50mm prime lens which is amazing! It makes for a very compact and portable portrait combination.

A few words about the shoot itself and then I’ll let the images do the rest of the talking: I chose ilford HP5 for this shoot because it was kind of overcast and we were shooting under tree cover so I wanted something flexible enough to handle any situation, I shot it at 800 and I love the results! HP5 absolutely sings when it’s pushed and I think these have a lovely tone and feel to them. A huge thank you to model Danni AKA Pandora Belle - she absolutely nailed it on this shoot, Danni is a very talented model and it was really great to work her on this shoot.

Jupiter 9

Jupiter 9

Jupiter 9

Jupiter 9

Jupiter 9

Jupiter 9

Jupiter 9

Jupiter 9

Jupiter 9

Jupiter 9

Helios 44-2

Helios 44-2

Helios 44-2

Helios 44-2

Helios 44-2

Helios 44-2

Helios 44-2

Helios 44-2

Once again my thanks to Danni for being such an amazing model and also to Exposure Film Lab who develop and scan all my portfolio work - they’re the best!

To say that I am over the moon with the results would be an understatement! First run out with the Helios 44-2 and the Jupiter 9 and I am so happy with how the images came out - in fact I think they make a good pairing, they have similar characteristics. The Helios has a little more swirl in the Bokeh where as the Jupiter 9 is buttery smooth but they both have excellent sharpness, contrast and detail but then you already know that as you’ve just seen the images right?! I’ll certainly be using this set up again in the near future and putting and I’ve really enjoyed shooting black and white portraits for a change, i use colour a lot in my portraiture so I wanted to mix it up a little, for me casual/day to day and personal work I’ve found Ilford HP5 to be such a versatile film, but I’ve never shot portaits with it - I love the results!

Kodak Pro image 100 & Portra 160 review - Portrait shoot out

Now that I have FINALLY settled on some camera kit that I’ll be keeping around for the long term I can focus my energies on exploring different film stocks - not that I wasn’t doing that anyway but I was finding flitting from one camera to the next a bit of a distraction, for the record the cameras which have won my heart are the Nikon F2 and Pentax 67 - today’s blog features a portrait shoot on the F2 shooting with a shiny new portrait lens and using two different film stocks Kodak Pro Image 100 (a new film to me) and Kodak Portra 160 (a film I have used a few times before)

Whilst the main focus of the conversation will be on looking at the two film stocks first up I’ll take a moment to show you the kit I used on this shoot, I’ll then take you through the shoot itself.

IMG_2740(1).JPG

I have just bought the very wonderful Nikkor 105mm 2.5 a lens which has a HUGE reputation as an amazing portrait lens, when i bought it the focus ring was quite stiff so I sent it off for repair to a chap called Miles Whitehead who did a great job of fixing it and it now has silky smooth focus action - I would highly recomment Miles if you have some camera kit in need of some TLC check his site out HERE. In fact as I write this I am reminded that Miles also serviced my F2 when I bought it so double thanks!! :)

I was originally going to include a few thoughts on the 105mm lens in todays blog but I loved using it so much that I think I’ll reserve that for a dedicated blog all of it’s own - suffice it to say that it’s reputation is very well earned, an amazing piece of glass!

Ideal for portrait, weddings and social events dontcha know…..

Ideal for portrait, weddings and social events dontcha know…..

I think most people will be familiar with Kodak Portra 160 which is a mainstay of Kodak’s professional line up, but what’s this Pro Image 100 all about? I’ve been shooting a lot of Portra 400 and 160 recently and whilst I love both film stocks I am always interested in trying new things and the results I’d seen from Pro Image appealed to me - the other great thing about Pro Image is the price! I got this for £25.95 for 5 rolls!

This film stock has only recently come to the UK/European market - despite being around since the mid 90’s, the stock was only sold in warmer climates, big thanks to the good folks at Nik & Trick for being instrumental in making the case to Kodak for getting this film available in Europe :)

Ok so I have a lovely film camera - check, a great portrait lens - check, a shiny new colour film - check, a beautiful location to shoot in….check! What’s next? I need someone to photograph! Fortunately I’m part of a great facebook group for photographers and models to network and arrange shoots - Danni is someone I met through this group and we’ve shot together before when i was testing out my Pentax 645, you can see those images HERE.

Also worth mentioning at this point that i had my films processed and scanned by the good folks at Exposure Film Lab who I must thank again for their brilliant work, I use them for all my colour films these days because I just love the results I get from them - check them out HERE

The vibe for this shoot was a really natural summer look to make the most of the bright sunshine, we had a beautiful location filled with light, flowers, tall grass and trees - let’s GO!

First up i loaded Kodak Pro Image 100…

0-14.jpg
0-17.jpg
0-10.jpg
0-3.jpg
0-16.jpg
0-26.jpg

Ok then at this stage in the proceedings the word at the forefront in my mind is wow! Danni is a very talented Model which makes my job much easier and the Pro Image film is just lovely :) Let’s move on to the Portra 160 which I loaded up next and we’ll do a bit of a comparsion at the end, here’s the Portra shots…

0-16.jpg
0-14.jpg
0-12.jpg
0-23.jpg
0-7.jpg
0-4.jpg

The entire shoot lasted about an hour (if that) we went for a stroll through some lovely scenery and together we created some properly beautiful portraits full of light and life! Danni is a great model she did a brilliant job on this shoot, she puts lots of character into her work and is just a natural in front of camera, this really shines through the images - we’ve worked together before which I think always helps so we’re relaxed and comfortable working together and meant we were able to just get right into it and enjoy the shoot. I’m over the moon with the photos we created together - thank you Danni :) Check out her portfolio HERE.

In summary then both film stocks are clearly capable of wonderfully sharp, textured images with great skin tones, colour balance, contrast and detail - I therefore love them both! They each have their own look so whilst they’re comparable I think there are some differences to take into consideration. This was never intended as a ‘one film versus the other’ contest in which we have a winner and a loser but rather an opportunity to look at how these two film stocks worked under the same conditions - to that end I simply invite you to make your own mind up which you like best - or maybe like me, you like them both?!

Here’s a few of my thoughts on each stock:

Pro Image 100 - it has a wonderful grain structure, punchy contrast and I love how it handles the greens and yellows, shadows perhaps not holding as much detail as portra, it has a classic film ‘look’

Portra 160 - minimal grain as you’d expect from portra, slightly muted colour palette although in these images it produced stronger contrast than I’d expected, Portra definitely holds on to more shadow detail and also perhaps slightly sharper.

What does all this show us then? Well they’re very close actually, much closer than I’d have thought! One aspect which does create an opportunity for comparison is the price with a five pack of Portra 160 retailing at around £35.99 and a five pack of Pro Image around £25.95 then clearly if budget is the deal breaker then Pro Image is your winner, if you absolutely must squeeze every bit of detail out of the shot then perhaps Portra is the one to choose - ultimately we’re all winners here as we in the UK now have access to the lovely Pro Image and I’ve got 4 more rolls sat waiting to go! I can’t wait to shoot it again.


Street Portraiture on 35mm film with the Nikon FE2 & F2

 
Partners in crime - my trusty FE2 (left) alongside it’s new bezzie mate the F2

Partners in crime - my trusty FE2 (left) alongside it’s new bezzie mate the F2

Lots and lots and lots to update you with since the last blog post which was all the way back in December!! I’ve been mega busy with lots of different projects and got loads to tell you all about, so since it’s almost a quarter of the way through already let’s finally get the 2019 blogging season off to a start shall we!

Remember last time I was saying things like “I’m going to focus more on creating photos” and “I won’t be doing as many gear reviews” and “gear just gets in the way” well I still think that’s true but owing to my contrary nature I’d like to introduce you to my latest gear acquistion… the Nikon F2!! Rather than just a boring old review thought this time I’ll be sharing some images i shot with this amazing camera on a recent portrait shoot as well, but first let me take you for a walk around the F2

IMG_0114.jpg

Ever since selling my Nikon F3 last year I have had a Nikon F Series shaped hole in my heart/camera collection (check out this link for the reason why I sold the F3) back in mid December I decided (after not very much deliberation) to buy myself an F2, cos ya know..I worked really hard last year and it’s nice to treat yourself every now and again and it was the run up to Christmas and… well, you get the idea…

I found this beauty on Evilbay for the ridiculous price of £70 and so a deal was done, the caveat being that the camera was from Japan so taking a bit of a punt on condition and shipping times, but as with my previous experience of international purchases the shipping is mega quick, it’s really only on arrival into the custody of Her Mahesty’s rip off merchants here in good old blighty that things slow down, after an almost literal ice age in UK customs my camera was finally released to me and there was much merry making and feasting by all….. sort of… two things became clear fairly quickly 1: it was in very good condition and functionally worked perfectly 2: there were traces of dreaded fungus in the viewfinder and in the mirrorbox which didn’t bode well and therefore i was going to have to shell out some more cash (and wait even longer) before getting to grips with the F2 - it’s all sorted now though, fresh from a good clean and service I even managed to negotiate a part refund from the ebay seller which paid towards the cleaning :)

There’s oodles of info out there on the interwebs about the F2 so there’s not much point in me re-hashing it all, suffice it to say that between 1971 and 1980 if you wanted a professional level Nikon SLR then this was it!! Instead of reeling off a list of it’s features and functions I’m going to share with you a series of images I shot with both the F2 and my trusty Nikon FE2 on a portrait shoot recently, I’ll share my experience of shooting with it too of course and no doubt indulge in some techno-babble along the way as is my want…

Oh yes and interesting/geeky factoid alert! The serial number on my F2 is 7865098 and thanks to the wonders of the internet and some Nikon nerds who collate all this info I was able to date manufature of my particular camera to between May & August 1977 - so this camera is only a few months older than me! :)

Ok so that’s enough camera geekery for one blog, what’s the damn thing like to shoot I hear you cry… well… it’s amazing! build quality is second to none, it just feels very well balanced despite being quite a large camera, the viewfinder is HUGE and bright and lovely which makes manual focussing a doddle, alongside the ever brilliant FE2 I now have my perfect 35mm dynamic duo!

Portra 160 with the FE2 and series e 100mm 2.8

Portra 160 with the FE2 and series e 100mm 2.8

These images were taken on a portrait shoot with Model Rebecca back in Feb when we had a mini heat wave - I was so glad we made the most of the sunshine! The FE2 was loaded with a roll of Portra 160 and with the F2 I shot a roll of Fuji Acros 100 and a roll of Portra 400 - I enjoyed using this combination of film and cameras so much and was very happy with the results that I decided right there and then that I’m going to shoot film from now on for portraiture.

Fuji Acros 100 on the F2 with Nikkor 50m 1.4

Fuji Acros 100 on the F2 with Nikkor 50m 1.4

Let’s take a moment to reflect on the film stocks used on this shoot - I’ve had a couple of rolls of Fuji Acros 100 on ice in the freezer for a few years now and since buying it Fuji have discontinued production :( having only shot one roll of it before I figured I’d give it a whirl and I love the results, developed in HC110 it has a clean and balanced finished with lovely contrast.

Colour film duties were fulfilled by Kodak Portra one roll each of 160 and 400 flavours - I think i overexposed the 400 speed a couple of stops to 200 and shot 160 at box speed - having developed these myself I had some issues getting the right colour balance when scanning at home and for some frames it took me a little while to get the colours to look and feel ‘right’

Portra 400 on the FE 2 with Nikkor 24mmm 2.8

Portra 400 on the FE 2 with Nikkor 24mmm 2.8

img938.jpg

So there we have it - I was so pleased with how both cameras performed and I continue to be impressed at the quality of the Nikon lenses, the images here were shot on the Nikkor 50mm 1.4, Nikkor 24mm 2.8 and the Series E 100mm 2.8 - super sharp shooters the lot of them! If you’ve not tried an old Nikon camera and lens I would urge you to do so - there’s a reason why these were the manufacturer of choice for professionals back in the day.

Portra 160 on the FE2 series e 100mm 2.8

Portra 160 on the FE2 series e 100mm 2.8

I developed the colour film at home too - the first time in a long time that I’ve done that, I was really pleased with how they came out and I’ve got a write up of the process and kit that I used on the way, I promise it won’t be another 3 months before I write another blog, in the meantime happy shooting!


Shooting 35mm film in the studio

Using film in the studio is a really enjoyable experience, I was fortunate to be asked to second shoot my friend and fellow Photographer Ruth's fashion shoot in her studio a while back and had the opportunity to grab a few shots of very awesome model, Zivvy. All of the black and white shots were taken on Fuji Acros 100 film on a Canon EOS 3 camera, all the colour images on a Canon 6D DSLR.

img267-edit1-Edit.jpg

I love working in the studio - it's a real treat, most of the time I shoot on location which requires some flexibility in your approach to allow for all sorts of variables in lighting and the general randomness that comes from shooting on location (although that is part of the fun)! However in the studio YOU are in full control!  In these images there are three studio strobes - one either side and another overhead, with a fourth light providing a backlight to the white background so there's a lot to take into consideration, it's an exercise in balancing and shaping light to achieve a certain effect depending on the look you're trying to achieve. I take no credit for coming up with the concept or the lighting arrangements for this shoot - that was all Ruth!

img272-edit.jpg

It can take a while to get your lighting and composition worked out even when using a digital camera with the benefit of being able to instantly review  your shot, the process becomes slightly more protracted when using film, which is why I recommend using a combined approach - shoot film AND digital!

Back in the day photographers would often use a polaroid camera (or back for their medium format camera) to assess how the light was falling on their subject, polaroid is still available but it's expensive stuff, you can also get flash meters but they're not cheap either so I used my Canon 6D DSLR to meter the shots and judge the lighting - think of it as a digital polaroid! :)

Zivvy, Gav and Ruth reviewing the mood board and deciding on final styling

Zivvy, Gav and Ruth reviewing the mood board and deciding on final styling

As second shooter I took some behind the scenes photos on my 6D as Ruth, Zivvy and Gav the Hair Stylist did their thing - I really enjoy shooting candid, reportage images like this as it shows the hard work that goes in to making the final images - it's normal to spend a long time getting ready for even a simple shot and it's all part of the creative process that often gets missed out, behind the scenes shooting allows you to tell that story.

Zivvy trying out some vintage bling

Zivvy trying out some vintage bling

The key to a successful model shoot is not lighting, or kit it's....wait for it.... team work! Your ability to communicate, collaborate and ultimately create with the stylist, model, hair and make up artist is fundamental, I was fortunate in that Ruth had put together a great team and concept (and also put her make up skills to good use), Zivvy is a very talented model and the hair stylist Gav was also awesome, having a good team of people working together towards a shared goal is much more important that a whizzbang camera or lens or whatever (although of course they're nice to have too) ;)

IMG_6701.jpg
IMG_6728.jpg
IMG_6762.jpg

In order to integrate my digital and film sets ups when working in the studio I used a Canon EOS3 which has exactly the same mounts, inputs as the 6D so i could use the same lenses and flash triggers switching between film and digital as required, nice and simple it's no good spending ages faffing about trying to get ancient film gear to talk to modern studio lighting whilst the model, Hair and MUA, stylist et al are waiting for me to figure it all out, I like to shoot quickly and keep the energy going as I think this translates to the final images so having a fully integrated set up is a real bonus.

All of the black and white images you see here are Fuji Acros 100 35mm film which I semi stand developed myself in Adonal (on reflection probably not the best developer/process for the job as it's known to bring out the grain of the film and Acros is renowned for being smooth - next time I'll use something else)! I love the high contrast though!

img272-edit.jpg
img252.jpg
img287.jpg
img278.jpg

After the shoot I had a couple of frames left so I used them up around the studio.....

img277.jpg

Fuji Acros 100 is a lovely film, I kind of wish I'd been more patient and bought some more appropriate developer/used a more appropriate process but I was impatient to see the final images! Don't get me wrong though I love the images and am very happy with them I just think that a developer like Xtol or D76 would've made for a smoother finish perhaps - oh well! live and learn!

img280.jpg

Of course I wasn't just metering with the 6D - I enjoy digital photography very very much also, here are a few of my digital shots...

IMG_6858.jpg
IMG_6960.jpg
IMG_6780-Edit.jpg

So that's it then - I hope you've enjoyed this latest blog post. I'm really looking forward to working with a combination of film and digital cameras in the studio again soon :)